Get your first topic up and running
Want to know more how to easily send events to your topic? Let's get you started with a brand new topic, and send your first event.
Goal
We get it — getting started with a new platform can feel a bit overwhelming. But don't worry, we've got your back! 🎯 This guide is designed to get you up and running with Q-Flow in just five simple steps.
Here's what you'll achieve:
-
Step 1. Create your first Category
-
Step 2. Add an Event Type
-
Step 3. Set up your first Topic
-
Step 4. Create a Subscription
-
Step 5. Publish an event to your Topic
By the end of this guide, you'll be confidently managing and sending events like a pro, freeing you up to build the awesome products your users love. Let's dive in! 🚀
Let's begin
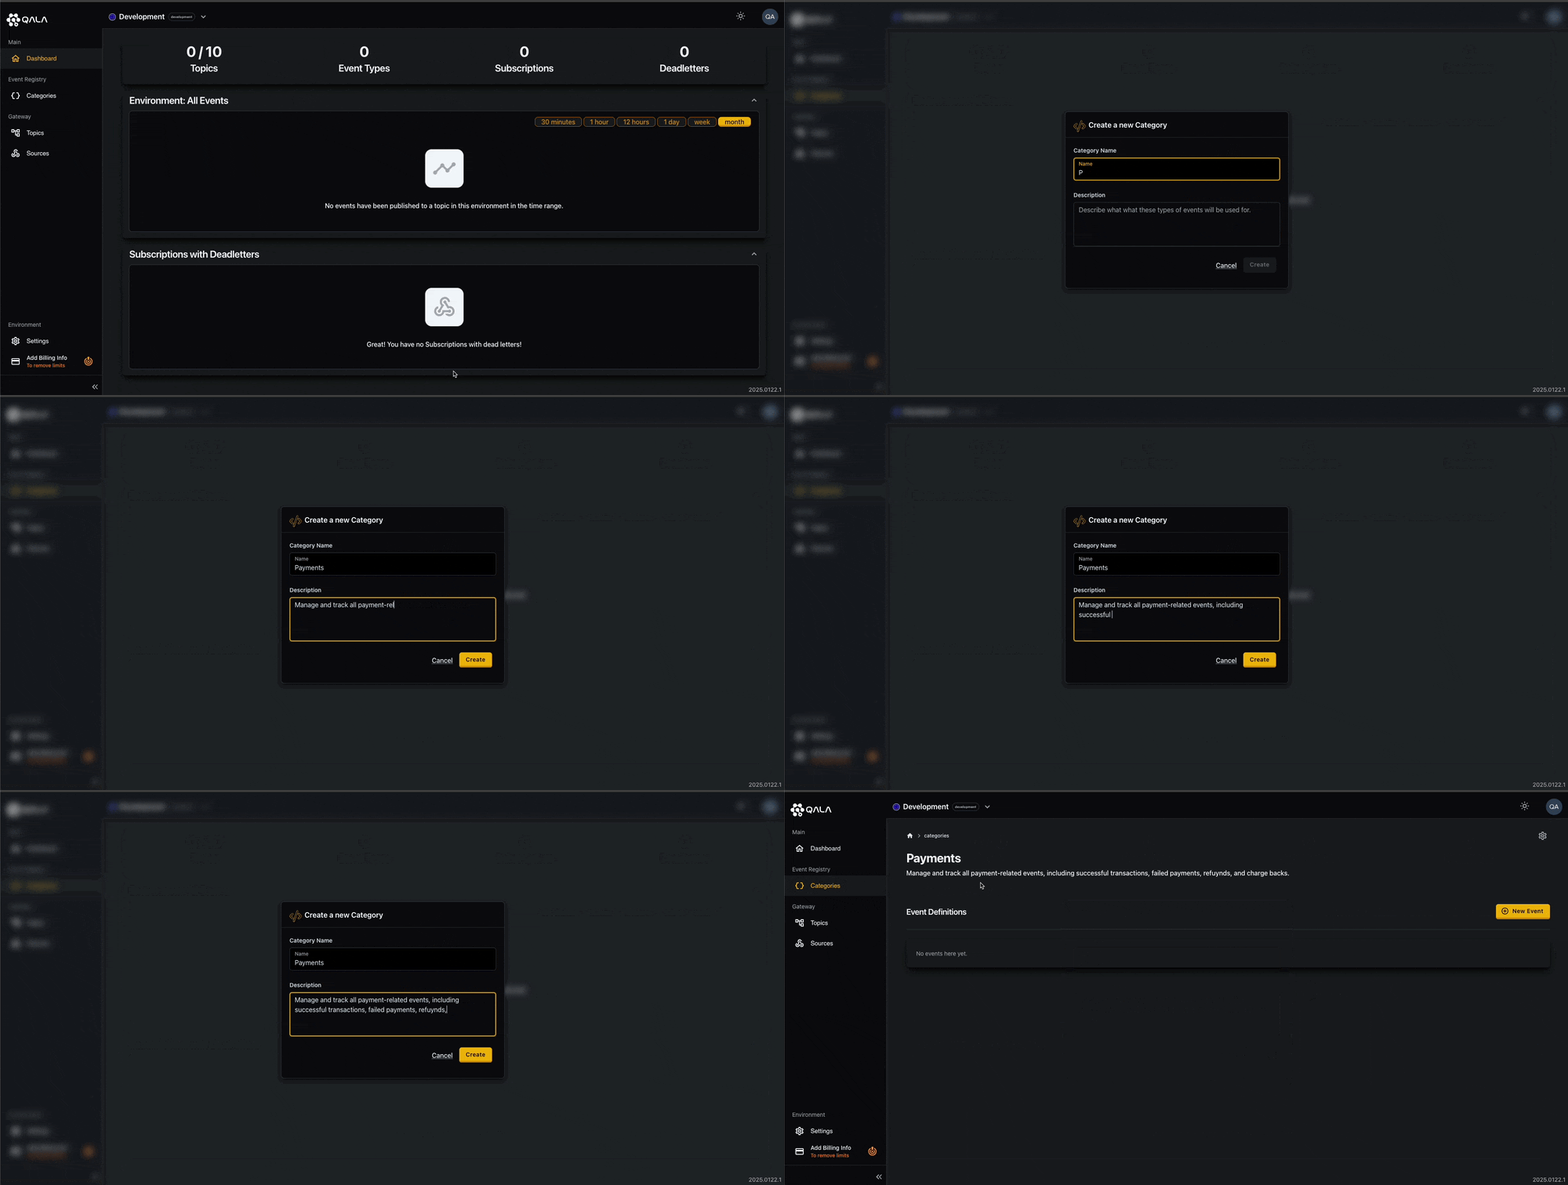
Step 1. Create your first Category
After successfully creating an account, the creation of a Category and Event Type must be accomplished.

To create a Category:
- Open the Management Portal.
- Select
Categoriesin the left sidebar menu. - Press the
Add Event Categorybutton. - Give the Category a unique name.
- Add a description for the Category.
- Press the
Createbutton.
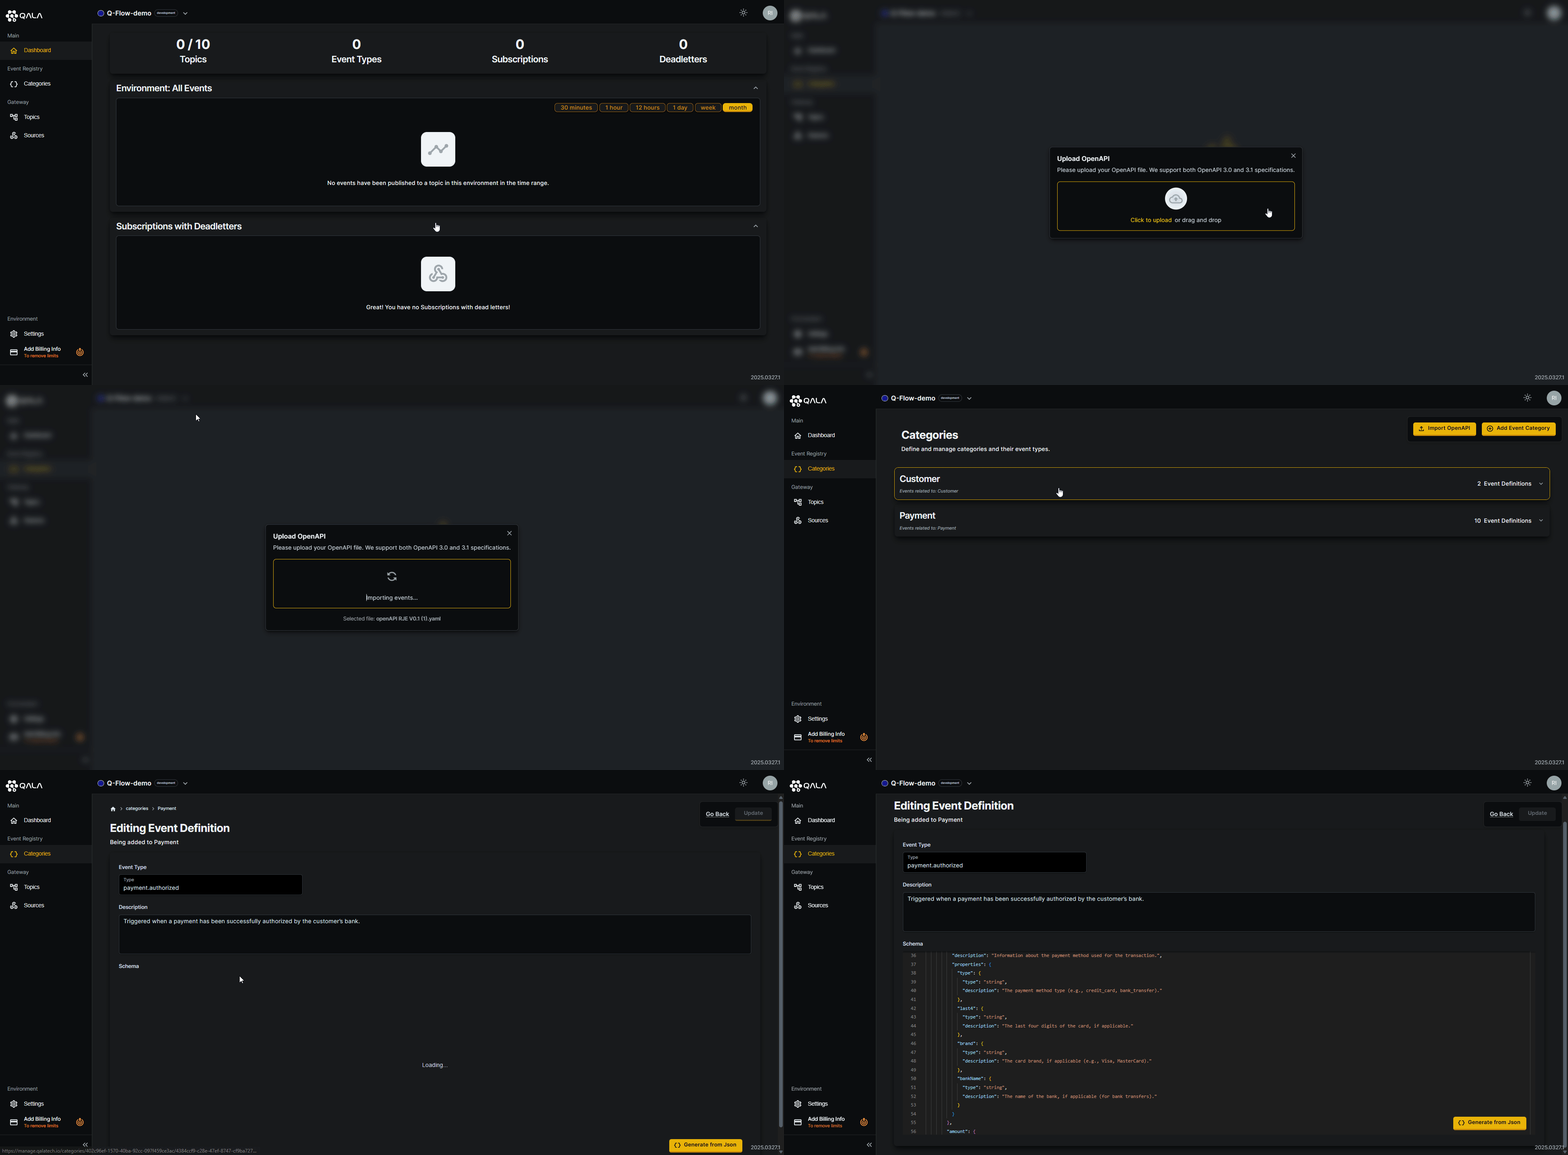
Alternatively, you can upload OpenAPI specifications, importing the Event Types and creating the applicable categories. Qala supports OpenAPI 3.0 (x-webhooks) and 3.1 (webhooks).

To import OpenAPI specifications:
- Press the
Import OpenAPIbutton. - Drag and drop, or upload a valid OpenAPI specification file from your computer.
Step 2. Create the Event Type
Now that you have successfully created your first Category, let's add an Event Type to it.

To create an Event Type for the newly created Category:
- Be sure to be inside the newly created Category.
- Press the
New Eventbutton. - Name the Event Type.
- Add a brief description to the Event Type.
- Define the schema of the Event Type or allow Qala to generate the JSON schema for you conveniently.
- Press the
Createbutton.
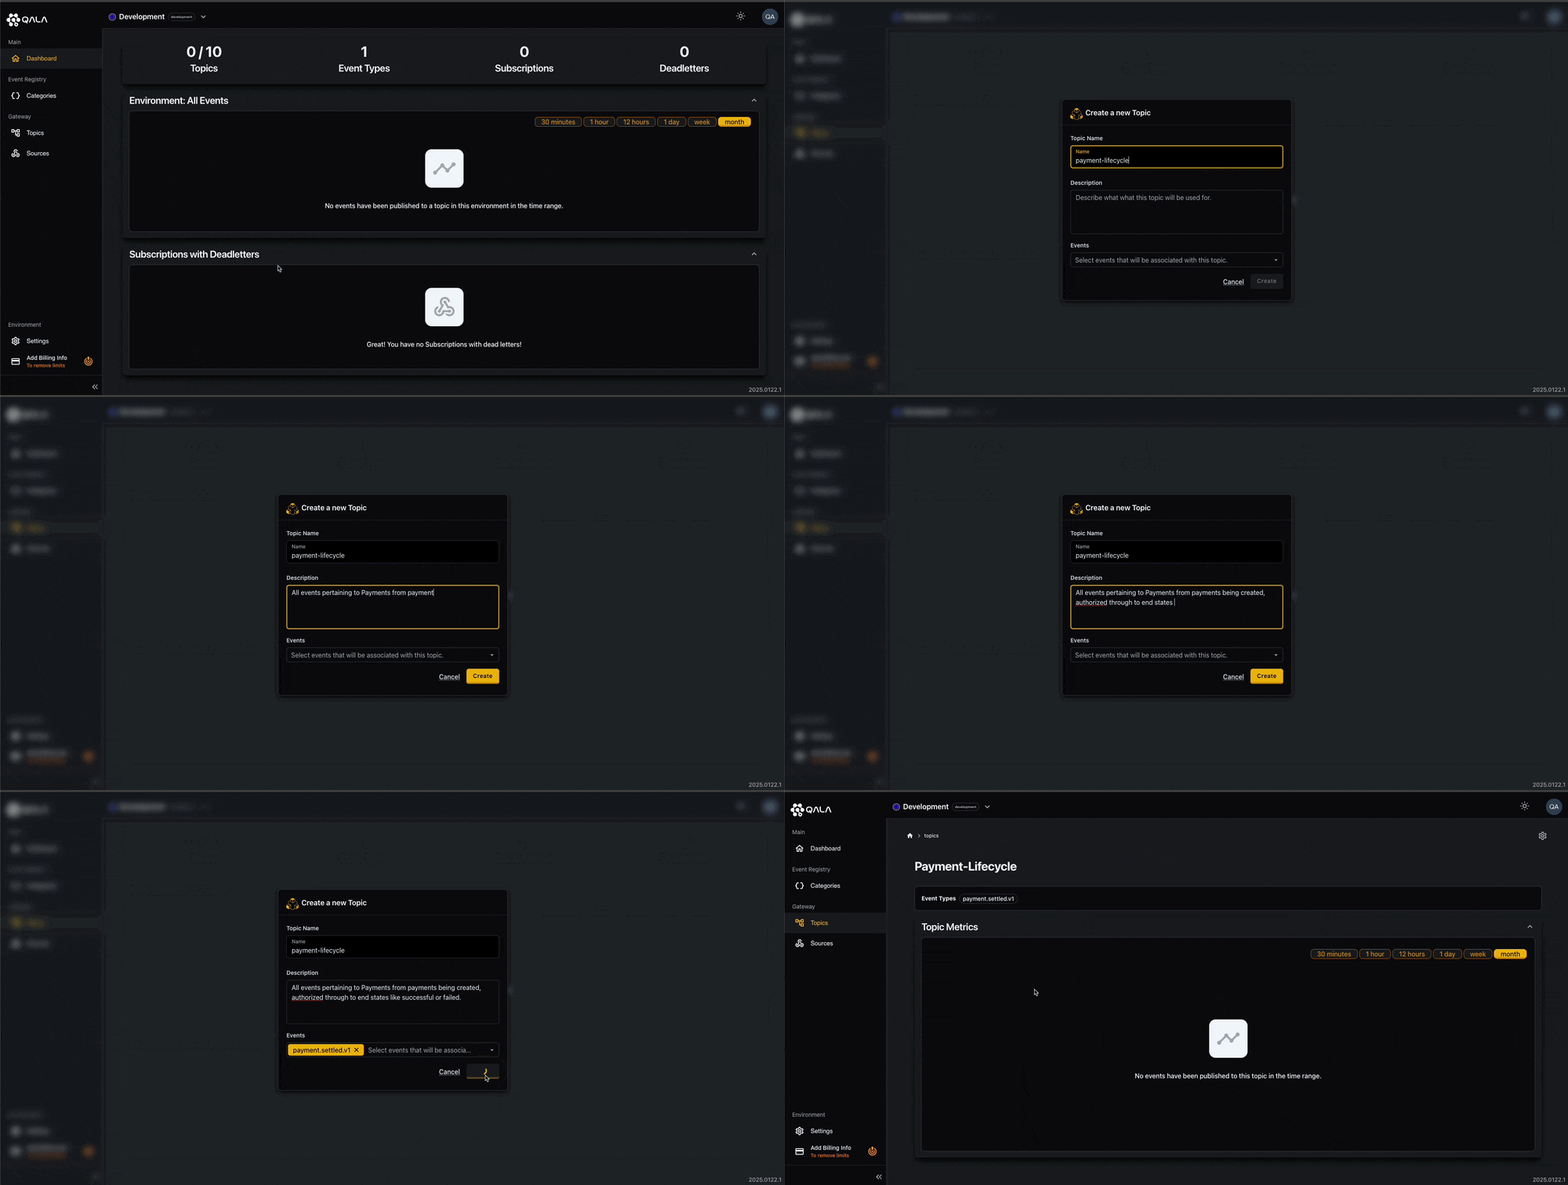
Step 3. Create your first Topic
Now, let's move forward and create a Topic within your Environment.

To create a Topic:
- Open the Management Portal.
- Select
Topicsin the left sidebar menu. - Press the
Add new Topicbutton. - Give the Topic a unique name.
- Add a description to the Topic.
- Select the applicable event types for the Topic. A drop-down list will show you the event type(s) created within the Registry, grouped by the associated category.
- Press the `Create\ button.
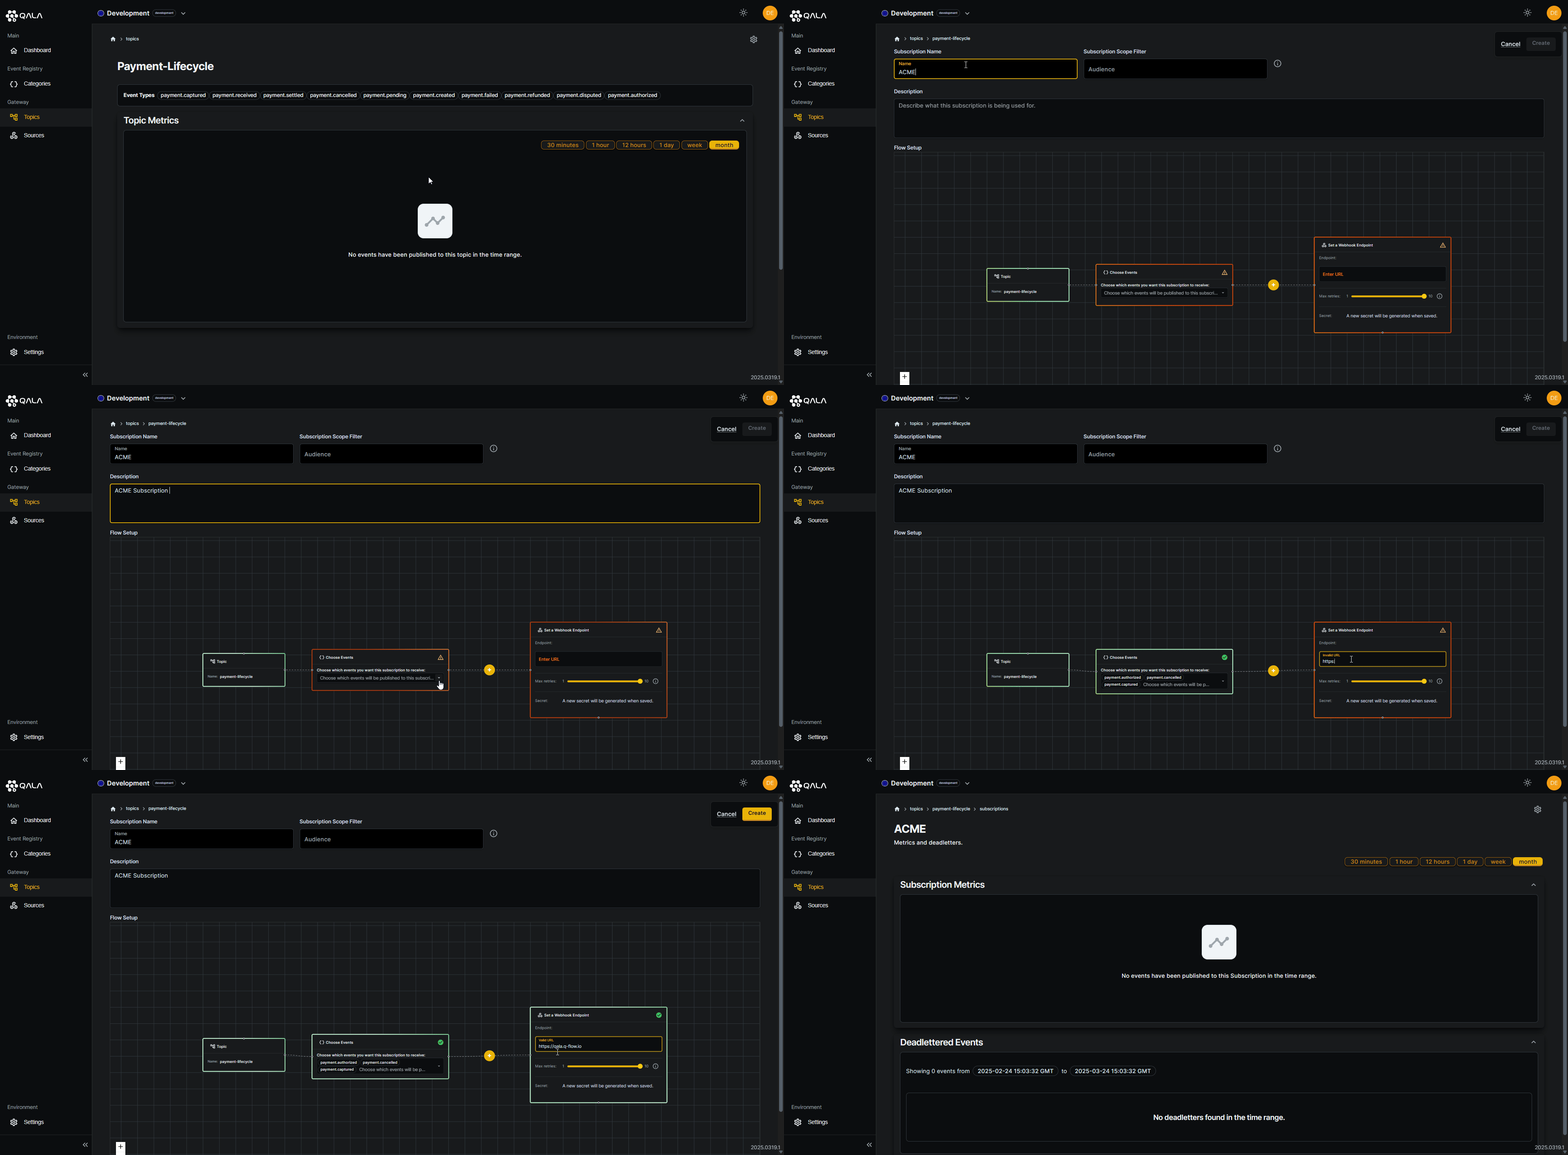
Step 4. Create your first Subscription
To create a Subscription:

- Be sure to be inside the newly created Topic.
- Press the
Add Subscriptionbutton. - Give the Subscription a unique name.
- If applicable, you can assign an Audience value for the Subscription Scope Filter.
- Add a description for the Subscription.
- Choose the events that the Subscription wants to subscribe to.
- If applicable, you can choose to apply advanced filtering, aggregation and transformation to incoming events.
- Set a webhook endpoint URL.
- Configure the maximum retries for the webhook.
- Press the
Createbutton. - Once the Subscription has been created, you can view the Subscription Webhook Secret.
Step 5. Publish an event to your Topic
In order to publish an Event to your Topic, you’ll need a Secret Key (check the Create an API Key section), along with the Environment ID.
An Event will only be published to the Topic if the type is a valid Event Type within the Event Registry. If you have an Event where it’s not defined in the Event Registry, or if the event is not associated with a Topic, you will receive a 400 bad request.
An array of events can be sent using the /v1/topics/{{topicname}}/events/publish endpoint.
| type required | string non-empty ^(?:[A-Za-z0-9.,_\-&()\[\]<>]{1,100})$ The type of the Event. |
| id | string or null The Id of the Event. |
| audiences | Array of strings or null Route the Events to the specified scoped audience. |
| data required | string non-empty The data of the Event. |
{- "type": "string",
- "id": "string",
- "audiences": [
- "string"
], - "data": "string"
}Summary
Congrats! You’ve taken your first steps into mastering Q-Flow by setting up your first topic and successfully sending events. Pretty awesome, right? Now that you know the essentials — from creating categories and event types to setting up subscriptions and publishing events — you're well-equipped to build event-driven solutions like a pro.
We’ve got your back, and Q-Flow is here to make sure your event management is smooth and worry-free. If you ever hit a snag or want to level up your skills, check out our other guides or reach out to us.
Happy coding, and here’s to building amazing things together! 🎉