Let's start fast
Let's create your first Source
Goal
We understand that setting up a new listener can seem daunting, but we're here to make it easy and fun! 🎯 This guide will walk you through the process of creating your first Q-Flow Source in just a few simple steps.
Here's what you'll achieve:
- Step 1. Create your first Q-Flow Source
- Step 2. Create your first Subscription
By the end of this guide, you'll be able to effortlessly receive and manage events from external services, ensuring no event slips through the cracks. Let's get started! 🚀
Let's begin
Step 1. Create your first Q-Flow Source
Effortlessly receive and manage webhooks from external services with a quick, one-time setup and no ongoing maintenance, thanks to Q-Flow’s advanced features—including:
- Guaranteed delivery (with exponential retries, dead lettering, and replay).
- Intuitive configuration through our UI, REST APIs, or CLI.
- Centralized authentication that eliminates provider-specific complexities.
- Scalable architecture that adapts to increasing event volumes without re-engineering.
Q-Flow Sources simplifies event management at scale by centralizing event ingestion, routing, and authentication into one intuitive platform. Built-in fault tolerance ensures no event slips through the cracks, while advanced filtering and aggregation let you focus on the insights that truly matter.

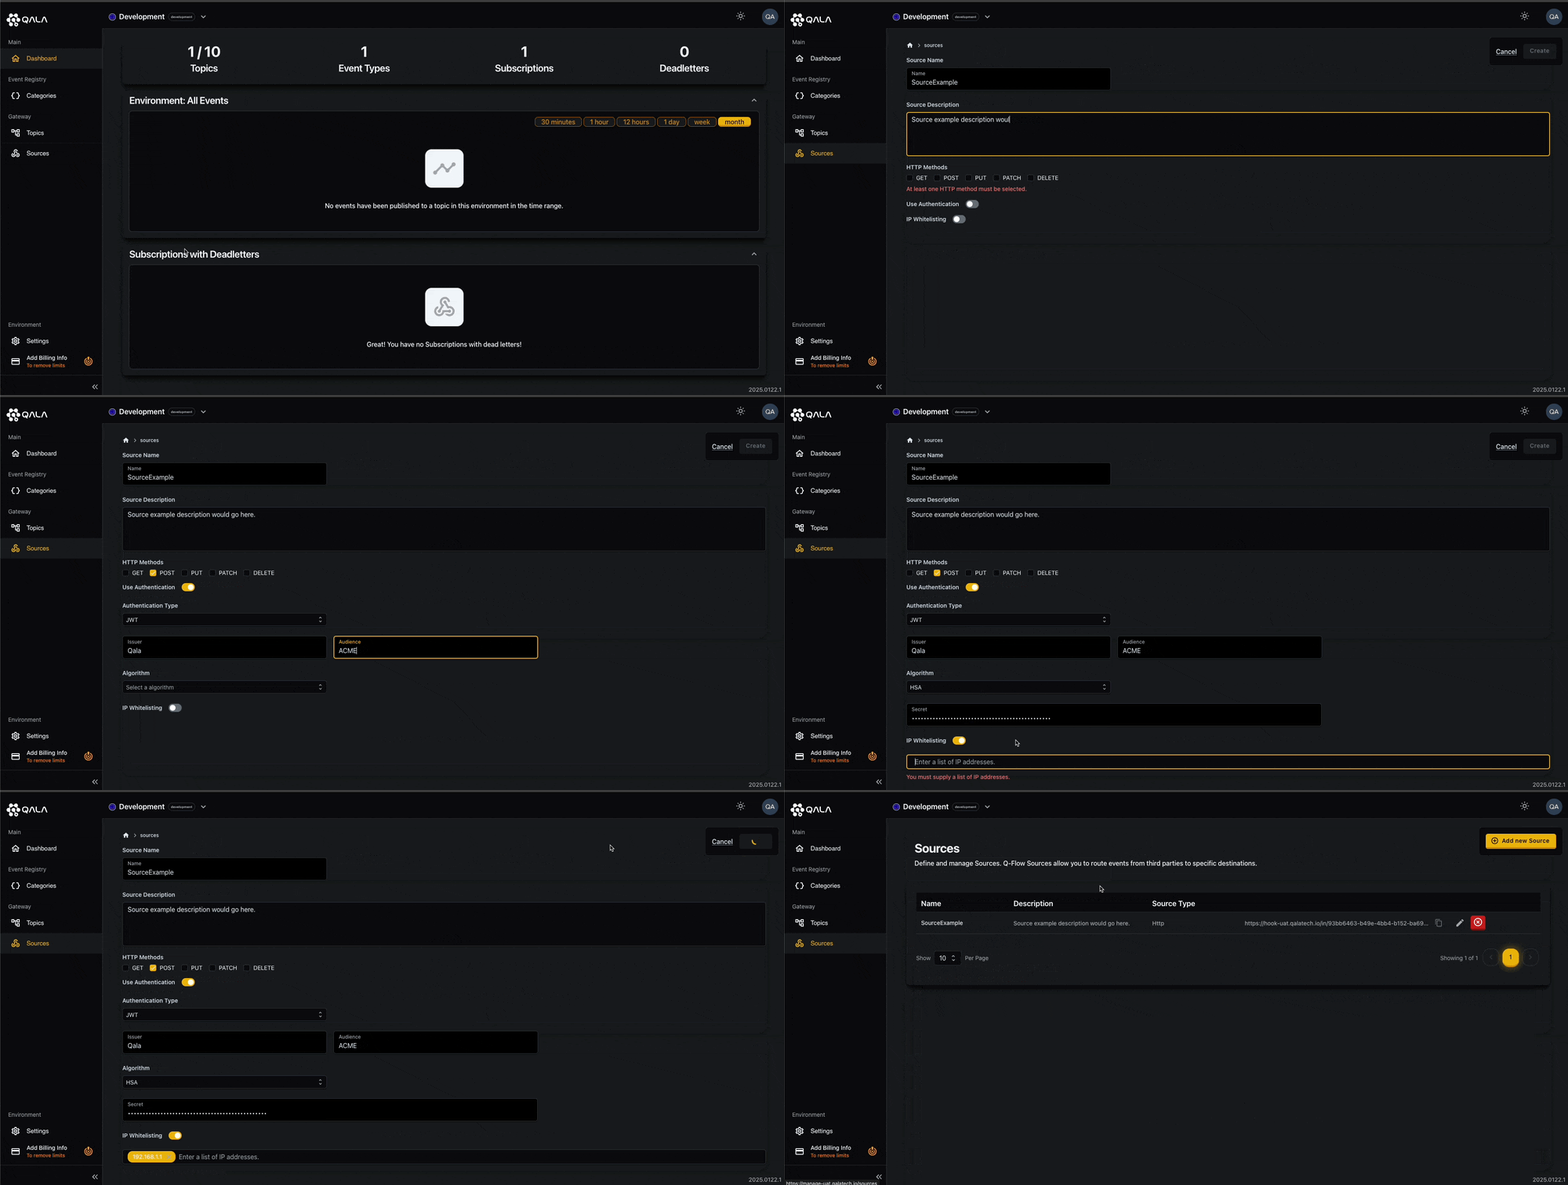
To create a Q-Flow Source:
- Open the Management Portal.
- Select
Sourcesin the left sidebar menu. - Press the
Add new Sourcebutton. - Give the Source a unique name (unique across both Topics and Sources).
- Add a description for the Source.
- Choose the applicable HTTP methods for the Source. At least one HTTP method must be selected to save the Source. Only the selected HTTP method(s) will be routed to your chosen destination Subscription.
- If applicable, choose an authentication type from the drop down menu, providing the authentication details/credentials. Only events that are successfully authenticated will be delivered to your chosen destination.
- If applicable, choose to apply whitelisting to IP addresses or CIDR (Classless Inter-Domain Routing) notation. You can supply both individual IP/CIDR or IP/CIDR ranges. Only events that are successfully whitelisted will be delivered to your chosen destination.
- Press the
Createbutton.
Step 2. Create your first Subscription
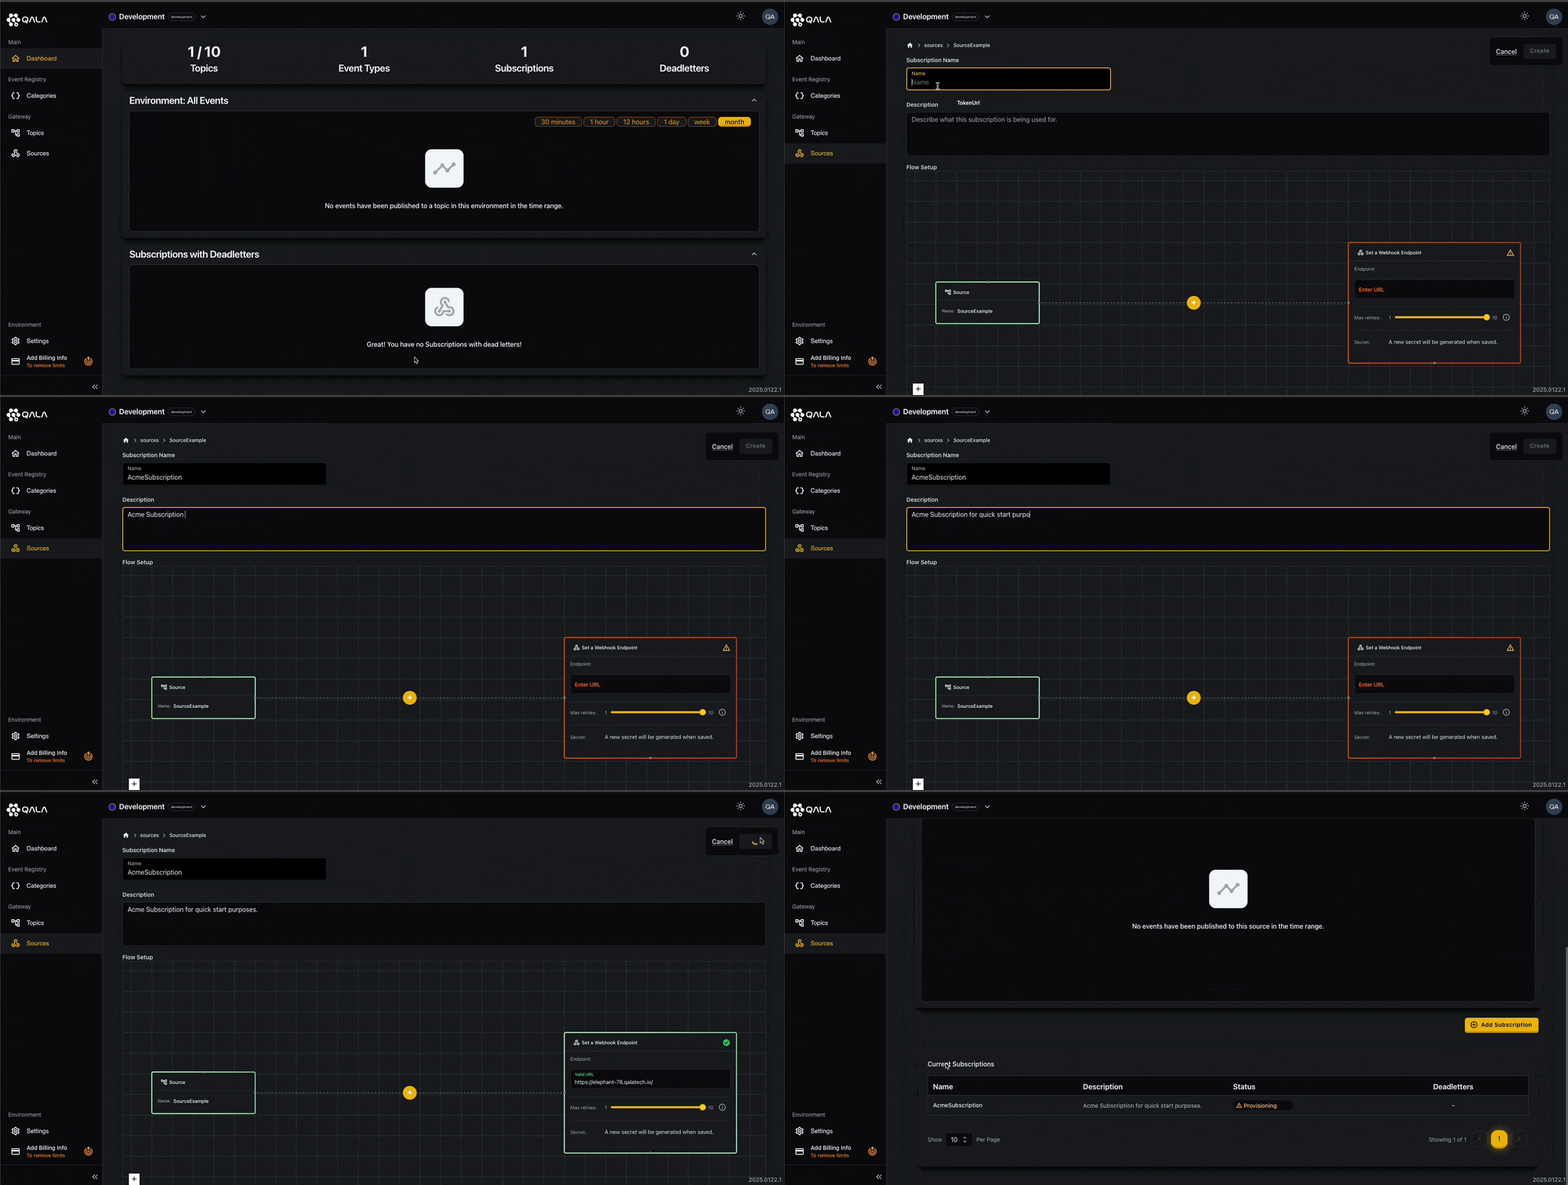
To create a Subscription:

- Be sure to be inside the newly created Source.
- Press the
Add Subscriptionbutton. - Give the Subscription a unique name.
- Add a description for the Subscription.
- If applicable, you can choose to apply advanced filtering, aggregation and transformation to incoming events.
- Set a webhook endpoint URL.
- Configure the maximum retries for the webhook.
- Press the
Createbutton. - Once the Subscription has been created, you can view the Subscription Webhook Secret.
You've now successfully created your first Q-Flow Source. After creating your Source, we'll generate a unique URL to use to route events through Q-Flow. Simply copy the URL and use this within external services.
Summary
Congratulations! You've successfully set up your first Q-Flow Source and Subscription. 🎉 Now you can effortlessly receive and manage events from external services, ensuring no event slips through the cracks. With Q-Flow's advanced features, you're well-equipped to handle event management at scale.
If you ever need more help or want to explore additional features, check out our other guides or reach out to us. We're here to support you every step of the way.
Happy listening, and here's to building amazing things together! 🚀