How do they work?
Get to know how you can define and protect event definitions
So, you’ve heard about the Event Registry feature and you’re curious how it works.
At its core, the Event Registry feature is built on effective event management and clear definitions. Let’s dive in and explore the first step: creating a Category.
Create a Category
A Category is a logical grouping that Event Types can be associated with one another. There is no rules or limitation on category groupings, but to aid subscribers, the categories should have logical grouping. For example, all Events pertaining to a customer could be conveniently grouped together. Or all Transactional events can be grouped together.
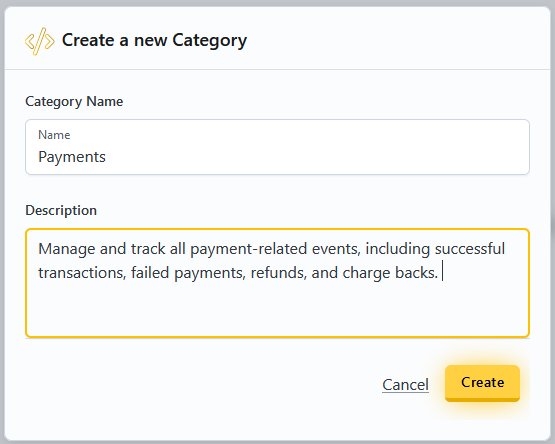
To create a Category:
- Open the Management Portal.
- Select
Categoriesin the left sidebar menu. - Press the
Add Event Categorybutton. - Give the Category a unique name.
- Add a description for the Category.
- Press the
Createbutton.
Update a Category
A Category is a logical grouping that Event Types can be associated with one another. You can conveniently edit or update Categories to reflect better category names or descriptions.
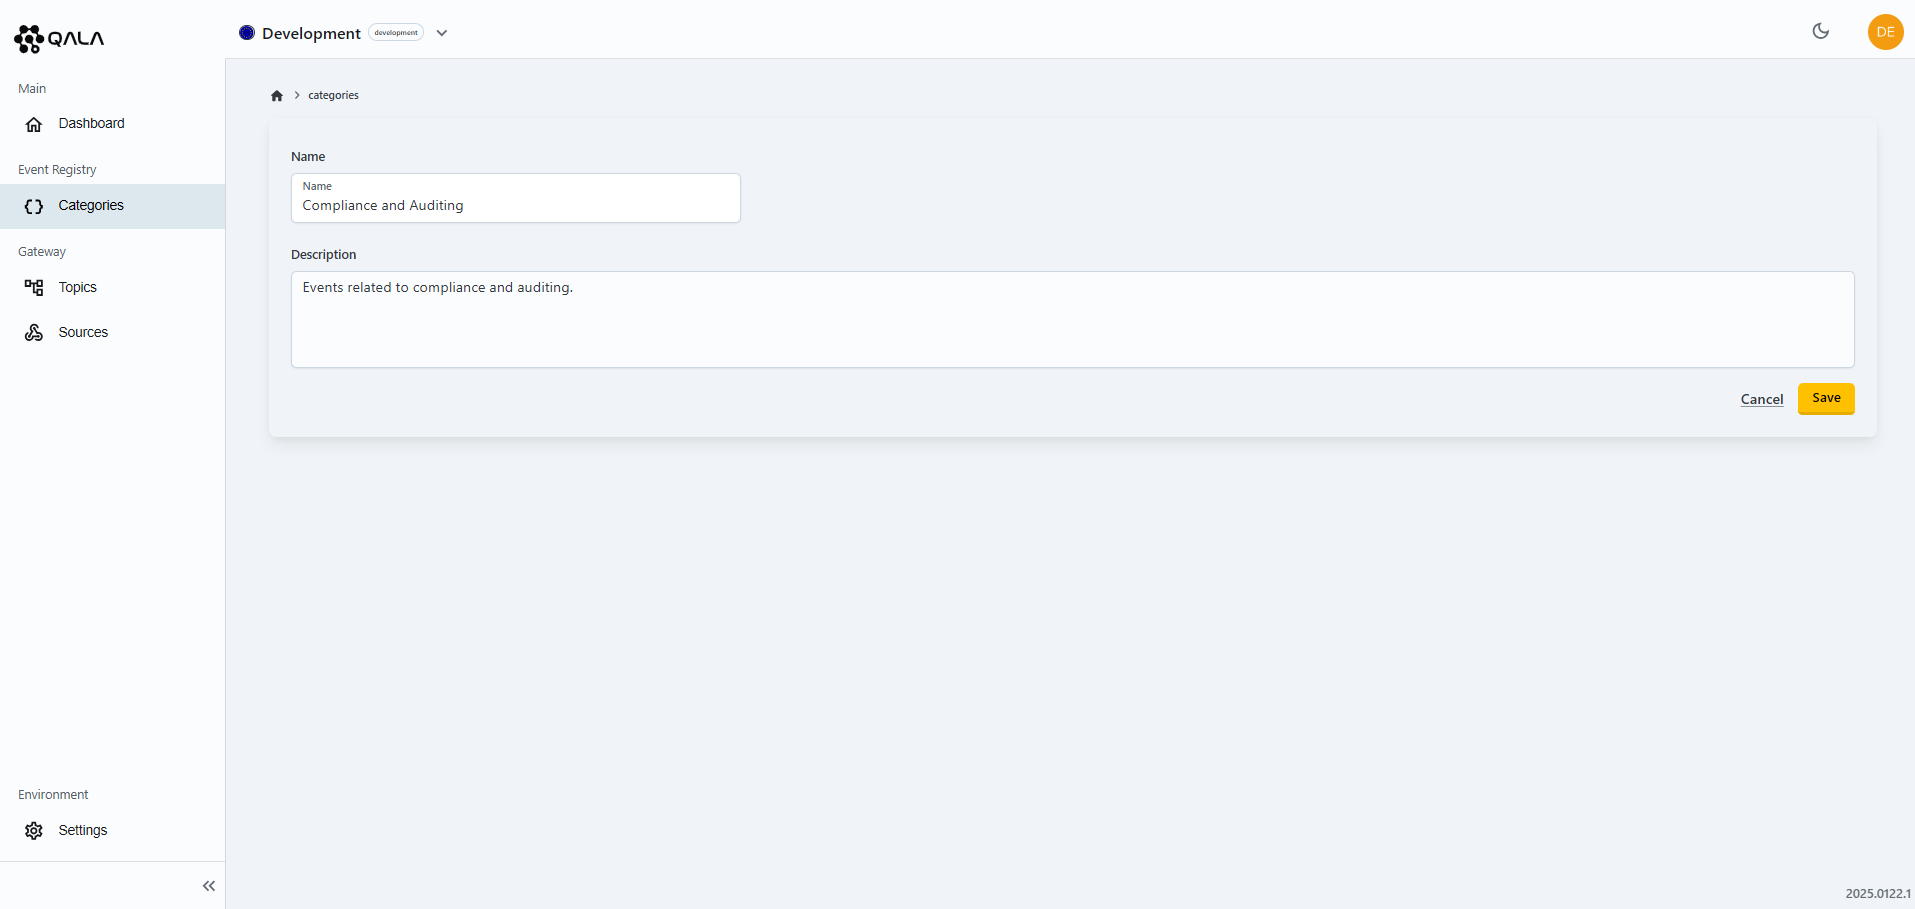
To edit a Category:
- Open the Management Portal.
- Select
Categoriesin the left sidebar menu. - Select the category you want to edit.
- Press the
Cogicon top right hand side. - Update the Category to a unique name.
- Update the description for the Category.
- Press the
Savebutton.
Create an Event Type
Now that you have successfully created your first Category, let's add an Event Type to it.
An Event Type in webhooks specifies the kind of event that triggers the webhook. It defines the particular action or occurrence, such as customer.created or order.completed that initiates the webhook call.
To create an Event Type for the newly created Category:
- Be sure to be inside the newly created Category.
- Press the
New Eventbutton. - Name the Event Type.
- Add a brief description to the Event Type.
- Define the schema of the Event Type or allow Qala to generate the JSON schema for you conveniently.
- Press the
Createbutton.
Upon the creation of the Event Type, we recommend:
- Naming the Event Type with a noun followed by a verb clearly indicates what entity is affected and what action occurred, enhancing readability and understanding. For example, "customer.created" specifies that a customer was created.
- To remove any ambiguity for the Event Type, you can add a brief description denoting what the Event Type is for and when the event is triggered.
- On the schema definition, you can simply copy an existing schema, ensuring it conforms to JSON schema standards or allow Qala to generate the JSON schema for you conveniently.
Import OpenAPI specifications
If your OpenAPI specification includes defined events, you can upload your YAML file directly to Q-Flow. Qala will automatically create Event Types and generate Categories based on the noun naming convention used in your spec. We support both OpenAPI 3.0 (x-webhooks) and 3.1 (webhooks) formats.
During import, Qala extracts and applies the event name, description, and schema to each Event Type. Event Types will be appended to existing Categories where applicable. If a referenced Category doesn't already exist, it will be created automatically and associated with the relevant Event Types.
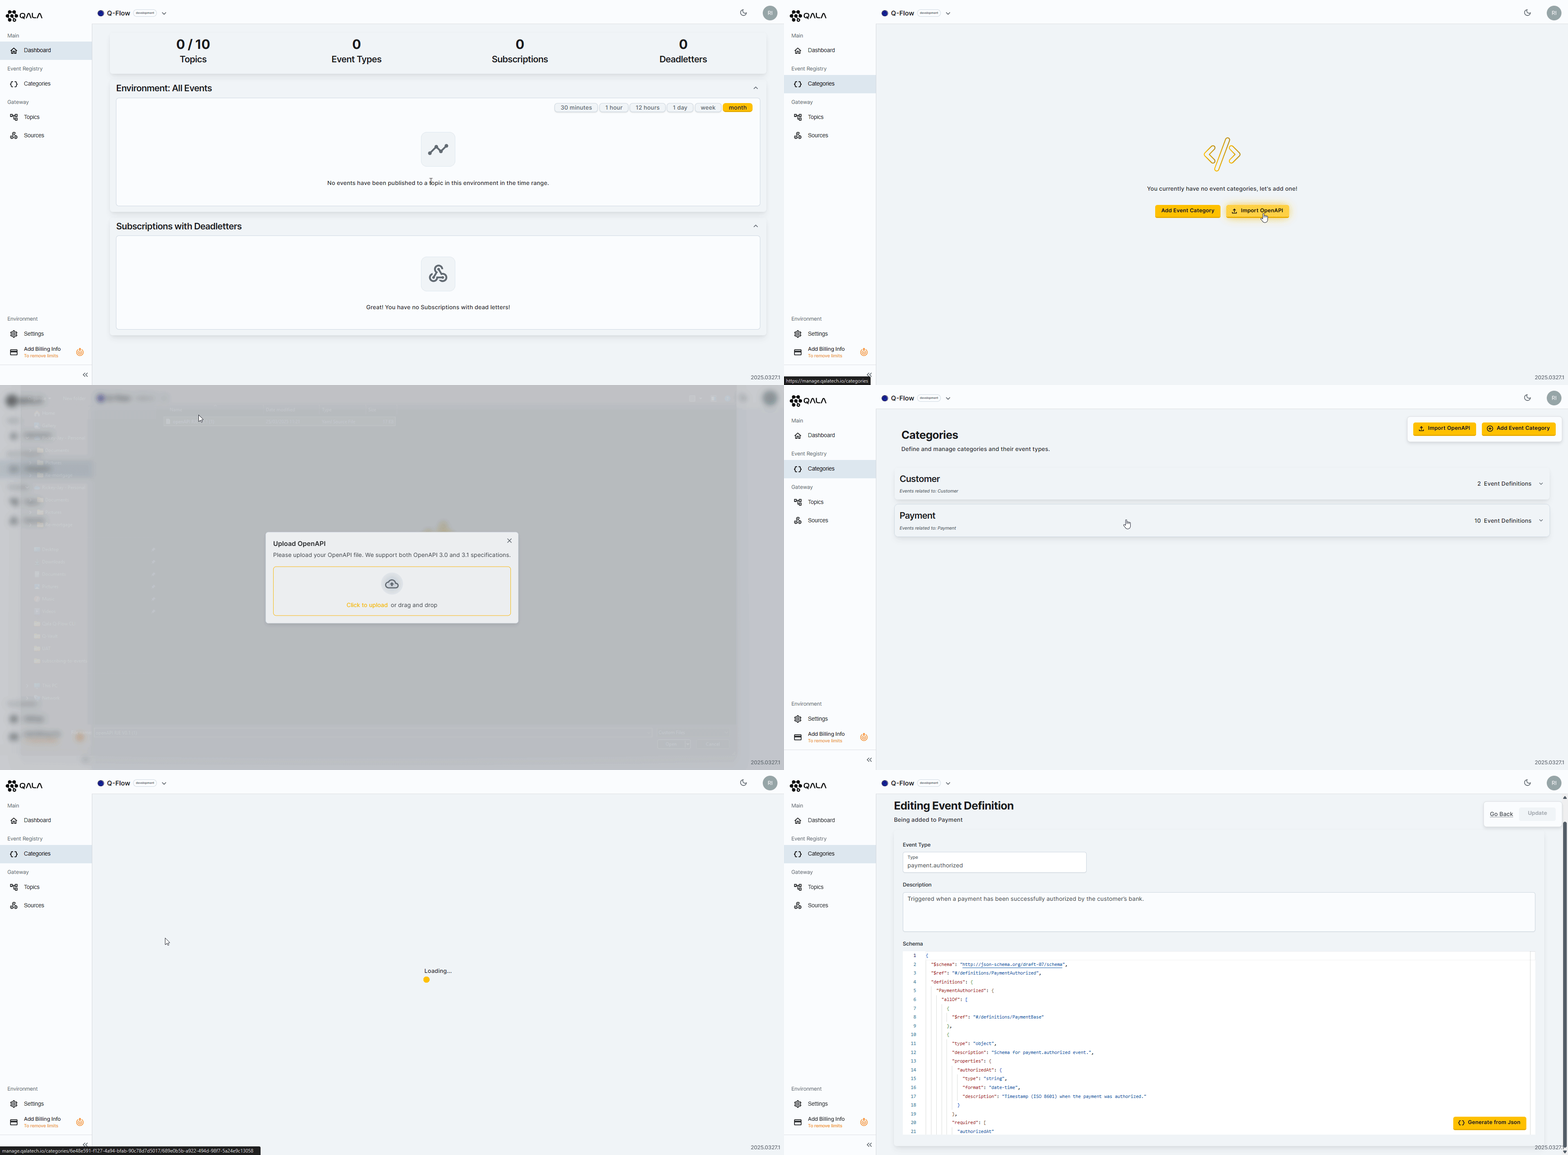
To import OpenAPI specifications:
- Press the
Import OpenAPIbutton. - Drag and drop, or upload a valid OpenAPI specification file from your computer.
Re-importing an existing Event Type will overwrite its description and schema. If the changes are breaking, be sure to communicate them clearly to your Subscribers. Whenever possible, use versioning to manage breaking changes and ensure a smooth transition.
Environment Schema Validation
Now that you have successfully created your first Category and event, let's explore Q-Flow's Environment Schema Validation.
Schema validation in Q-Flow ensures that only well-formed events conforming to a predefined structure are processed and published, enhancing data integrity and reliability for both Publishers and Subscribers. By enforcing schema validation at the Environment level, Q-Flow minimizes the risk of malformed events causing downstream disruptions, reducing debugging efforts and support costs. This validation can be toggled per Environment, allowing flexibility during development while maintaining strict enforcement in production for improved data quality and system stability.
When Schema Validation is enabled, only events that adhere to the predefined schema in the Event Registry will be accepted for publishing to a Topic. If an event fails to conform to the schema, the Publish request will be rejected with a 400 Bad Request response, providing clear error details to help diagnose and resolve validation issues efficiently.
To toggle the Environment Schema Validation:
- Select Environment
Settingson the left hand menu - On the top tab, select
Schema Validation - Choose whether or not to have the Validation applied for the Environment
- Once you've made a selection, you'll be redirected back to the Q-Flow Dashboard
Example of a validation failure
{
  "type": "https://www.rfc-editor.org/rfc/rfc7231#section-6.5.1",
  "title": "bad request",
  "status": 400,
  "instance": "/v1/topics/schema_validation/events/publish",
  "traceId": "0hna7js35dfv8:00000001",
  "errors": [
    {
      "name": "events",
      "reason": "event content for event type 'customer.created' failed schema validation: /deactivated: value is \"string\" but should be \"boolean\"."
    }
  ]
}
Update an Event Type
You can conveniently edit or update exiting Event Types to reflect better name, versioning, description or event schema.
To update an Event Type to reflect changes:
- Select the Event Type you want to edit by pressing the Event Name.
- Update the Event Type if applicable.
- Edit the description to the Event Type if applicable.
- Define the schema of the Event Type or allow Qala to generate the JSON schema for you conveniently.
- Press the
Updatebutton.
Remove Event Type from a Category
You can easily remove an Event Type from a category.
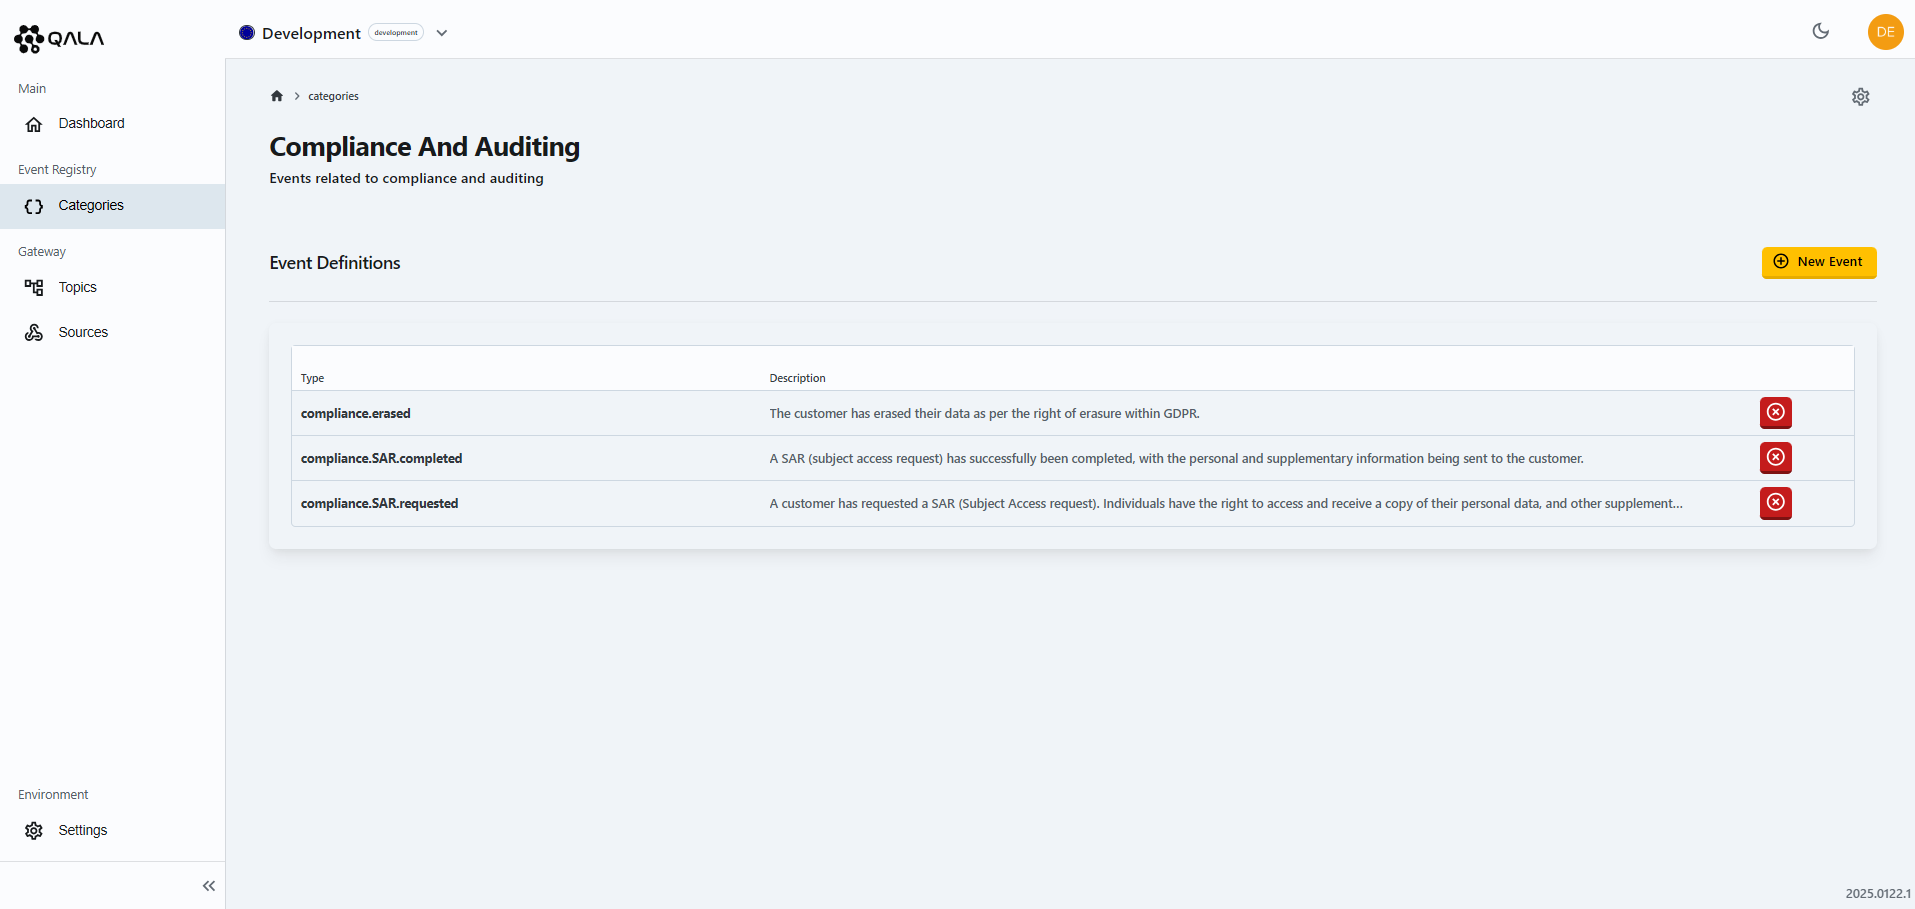
To remove an Event Type from an existing Category:
- Open the Management Portal.
- Select
Categoriesin the left sidebar menu. - Select the category you want to remove the Event Type from.
- Within the list of Event Types, choose the event you want to remove by select the
Xbutton. - Reaffirm the action to confirm the removal of the Event Type from the Category by pressing
Tickicon. - The Event will now be removed from that Category and placed within an uncategorized events category.
Don't worry, the Event Type will still be available to the Topic and Subscriptions, it will just be grouped under the uncategorized heading.
Move Event Type from a Category
You can easily move an Event Type from one category to another.
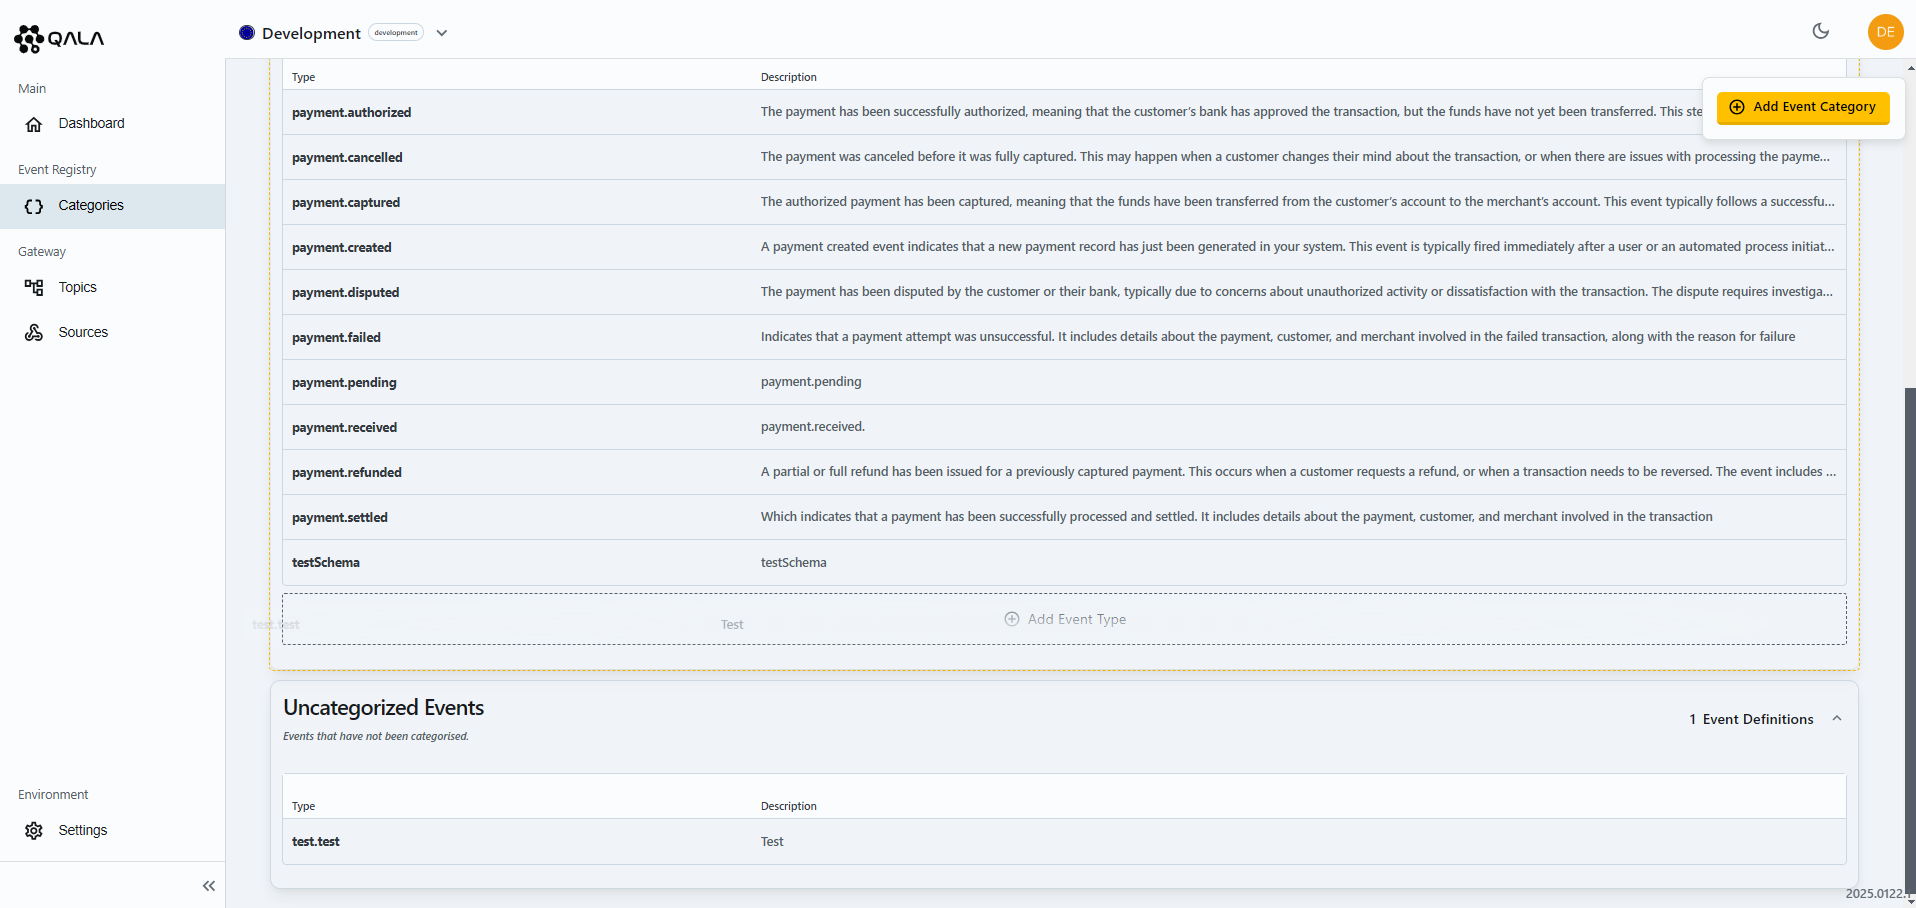
To move an Event Type from an existing Category to another:
- Open the Management Portal.
- Select
Categoriesin the left sidebar menu. - Click the category you want to move the Event Type from.
- Click on the Event Type and drag it to the desired category. Once you release the click, the Event Type will be successfully moved to the new category.


